
Chimichangas in an Air Fryer Recipe
Introduction
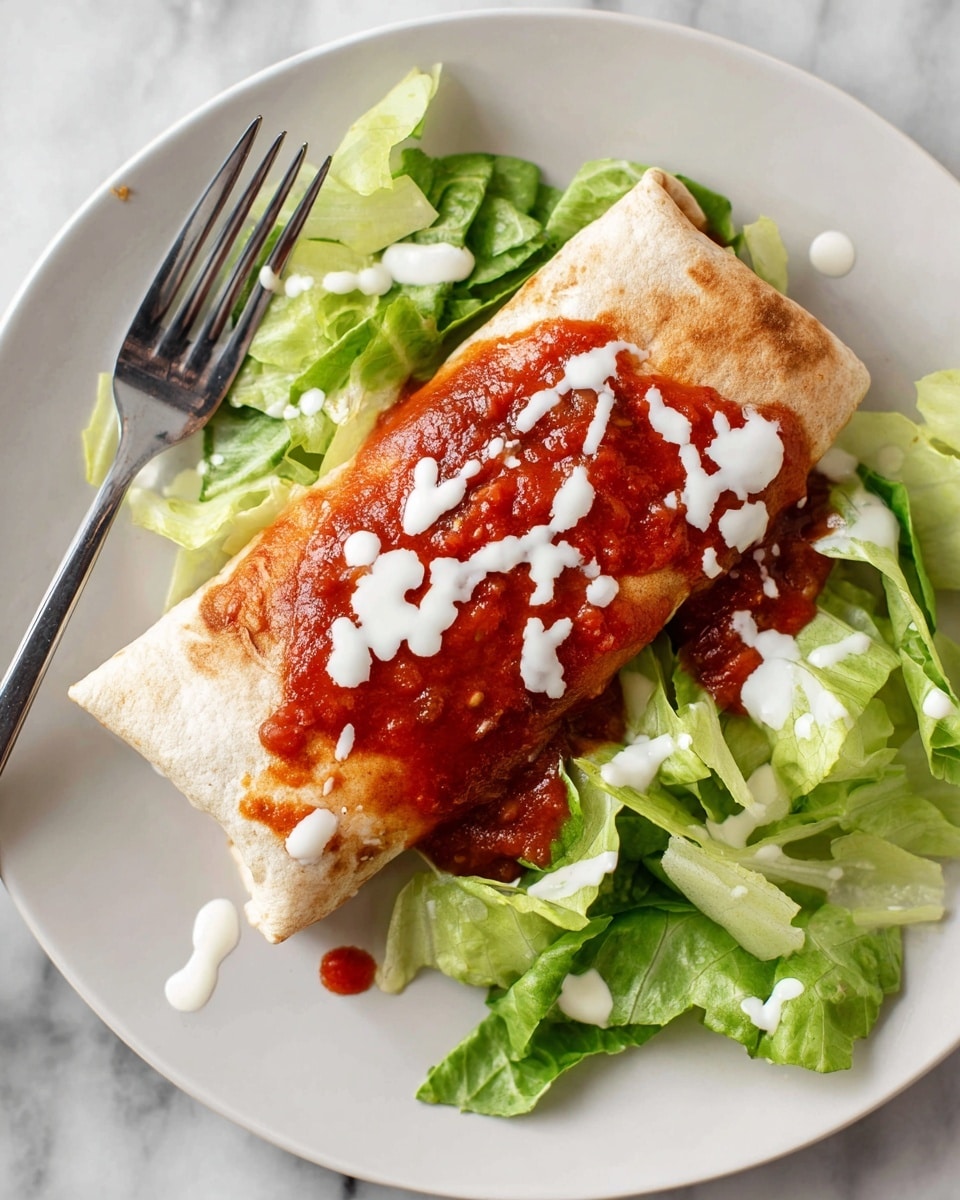
Chimichangas are a delicious, crispy treat that combines tender, flavorful chicken with beans and cheese, all wrapped in warm tortillas. Using an air fryer makes them perfectly crispy without deep frying, making this a lighter yet satisfying meal.

Ingredients
- 2 pounds boneless skinless chicken thighs
- 1 tablespoon avocado or olive oil
- 1 1/2 teaspoons ground cumin
- 1 teaspoon garlic powder
- 1 teaspoon salt
- 1 cup salsa
- 1 16-ounce can refried beans
- 6 burrito size flour tortillas
- 1 1/3 cups shredded Mexican blend cheese
- Avocado oil spray
- Optional for serving: greens, salsa, sour cream, cheese, cilantro
Instructions
- Step 1: Preheat the oven to 425°F. Place chicken thighs in a 9×13 casserole dish and drizzle with oil. Sprinkle cumin, garlic powder, and salt over the chicken. Use tongs to coat all pieces evenly, then arrange in a single layer.
- Step 2: Spoon salsa over the chicken, covering it completely. Bake for 25-30 minutes, or until the internal temperature reaches 165°F.
- Step 3: Remove chicken from the oven and let rest for a few minutes. Shred the chicken using two forks.
- Step 4: Transfer shredded chicken and cooking juices to a large bowl. Add refried beans and mix thoroughly.
- Step 5: Preheat the air fryer to 360°F for 3 minutes.
- Step 6: Lay out a tortilla and spoon about 1 1/3 cups of filling into the center. Sprinkle approximately 1/4 cup cheese on top.
- Step 7: Wrap the tortilla tightly around the filling to form a burrito: pull sides over ends, fold up the bottom, tuck in sides and bottom, then fold over remaining open tortilla to seal.
- Step 8: Place two chimichangas folded side down in the air fryer basket. Lightly spray the tops with avocado oil spray.
- Step 9: Cook at 360°F for 6-10 minutes until golden brown and crispy. Repeat with remaining chimichangas.
- Step 10: Serve immediately or store in the fridge for up to 4 days. Reheat in the microwave for 2 minutes before serving.
Tips & Variations
- For extra flavor, add chopped cilantro or a squeeze of lime to the chicken mixture before assembling.
- Use your favorite salsa variety for different spice levels and flavors.
- Swap refried beans for black beans or pinto beans for a different texture.
- To make them vegetarian, omit chicken and increase beans and cheese.
- To freeze cooked chimichangas, wrap individually in foil and air fry at 360°F for 18-20 minutes, flipping halfway through, to reheat.
Storage
Store cooked chimichangas in an airtight container in the refrigerator for up to 4 days. Reheat in the microwave for about 2 minutes or air fry until warmed through and crispy. For freezing, wrap individually in foil and freeze. Reheat frozen chimichangas in the air fryer at 360°F for 18-20 minutes, flipping halfway, to maintain a crisp exterior.
How to Serve
Serve this delicious recipe with your favorite sides.
FAQs
Can I use chicken breasts instead of thighs?
Yes, chicken breasts can be used, but thighs stay juicier and more tender after baking. Adjust cooking time to ensure breasts reach 165°F internal temperature.
Do I need to spray the tortillas with oil before air frying?
Spraying the tops of the chimichangas with avocado oil spray helps achieve a golden, crispy exterior without frying. There’s no need to spray the entire tortilla or flip during cooking.
PrintChimichangas in an Air Fryer Recipe

This delicious Chimichangas recipe features tender, spiced shredded chicken baked and combined with refried beans, then wrapped in flour tortillas and air fried to crispy perfection. Served with melted Mexican blend cheese and optional toppings like salsa, sour cream, and cilantro, these chimichangas offer a flavorful Tex-Mex meal ready in under an hour, making them an easy and satisfying dinner option.
- Prep Time: 15 minutes
- Cook Time: 35 minutes
- Total Time: 50 minutes
- Yield: 6 chimichangas 1x
- Category: Entree
- Method: Air Frying
- Cuisine: Mexican
Ingredients
Chicken Filling
- 2 pounds boneless skinless chicken thighs
- 1 tablespoon avocado or olive oil
- 1 1/2 teaspoons ground cumin
- 1 teaspoon garlic powder
- 1 teaspoon salt
- 1 cup salsa
- 1 16-ounce can refried beans
Assembly
- 6 burrito size flour tortillas
- 1 1/3 cup shredded Mexican blend cheese
- Avocado oil spray
To Serve (optional)
- Greens
- Salsa
- Sour cream
- Cheese
- Cilantro
Instructions
- Make the filling: Preheat the oven to 425°F. Place chicken thighs in a 9×13 casserole dish and drizzle with oil. Sprinkle with cumin, garlic powder, and salt, using tongs to coat all the chicken evenly in oil and seasonings. Arrange chicken in a single flat layer. Spoon salsa over the chicken, spreading it to cover completely.
- Bake chicken: Bake the chicken for 25-30 minutes or until the internal temperature reaches 165°F. Remove from oven and let rest a few minutes.
- Shred chicken: Use two forks to shred the chicken into bite-sized pieces. Transfer the shredded chicken along with the cooking liquid and salsa to a large bowl. Add refried beans and mix thoroughly to combine the filling.
- Preheat air fryer: Preheat your air fryer to 360°F for 3 minutes while you assemble the chimichangas.
- Assemble chimichangas: Lay out a tortilla and spoon about 1 1/3 cups of the chicken and bean filling into its center. Sprinkle approximately 1/4 cup shredded cheese over the filling.
- Wrap tortillas: Fold the sides of the tortilla over the filling tightly. Then, pull the bottom edge up and over the filling, covering the folded sides. Tuck the bottom edge into the burrito, also tucking in the sides from top and bottom, then fold over the remaining open tortilla to fully encase the filling, securing a tight chimichanga.
- Air fry chimichangas: Place two chimichangas folded side down in the preheated air fryer basket. Spray the top of each quickly with avocado oil spray. Cook at 360°F for 6-10 minutes or until golden brown and crispy. Repeat for two more batches to cook all six chimichangas.
- Serve or store: Enjoy chimichangas immediately, or store in the refrigerator for up to 4 days. To reheat, microwave for 2 minutes.
- Reheat frozen chimichangas: For previously assembled frozen chimichangas, wrap in foil and air fry at 360°F for 18-20 minutes, flipping halfway through. The foil prevents the outside from getting too crispy before the inside is heated through.
Notes
- Ensure the chicken is fully cooked to 165°F for safety.
- Wrapping the chimichangas tightly helps prevent filling from spilling during air frying.
- Use avocado oil spray for a healthier crisp and to avoid sogginess.
- Customize toppings with your favorite greens, salsa, sour cream, cheese, or fresh cilantro.
- Make ahead by assembling and freezing chimichangas; follow reheating instructions for best results.
Keywords: chimichangas, air fryer chimichangas, chicken chimichangas, Mexican food, air fryer recipes, easy Tex-Mex, shredded chicken, crispy chimichangas