Malibu Sunset Layer Cake Recipe
Introduction
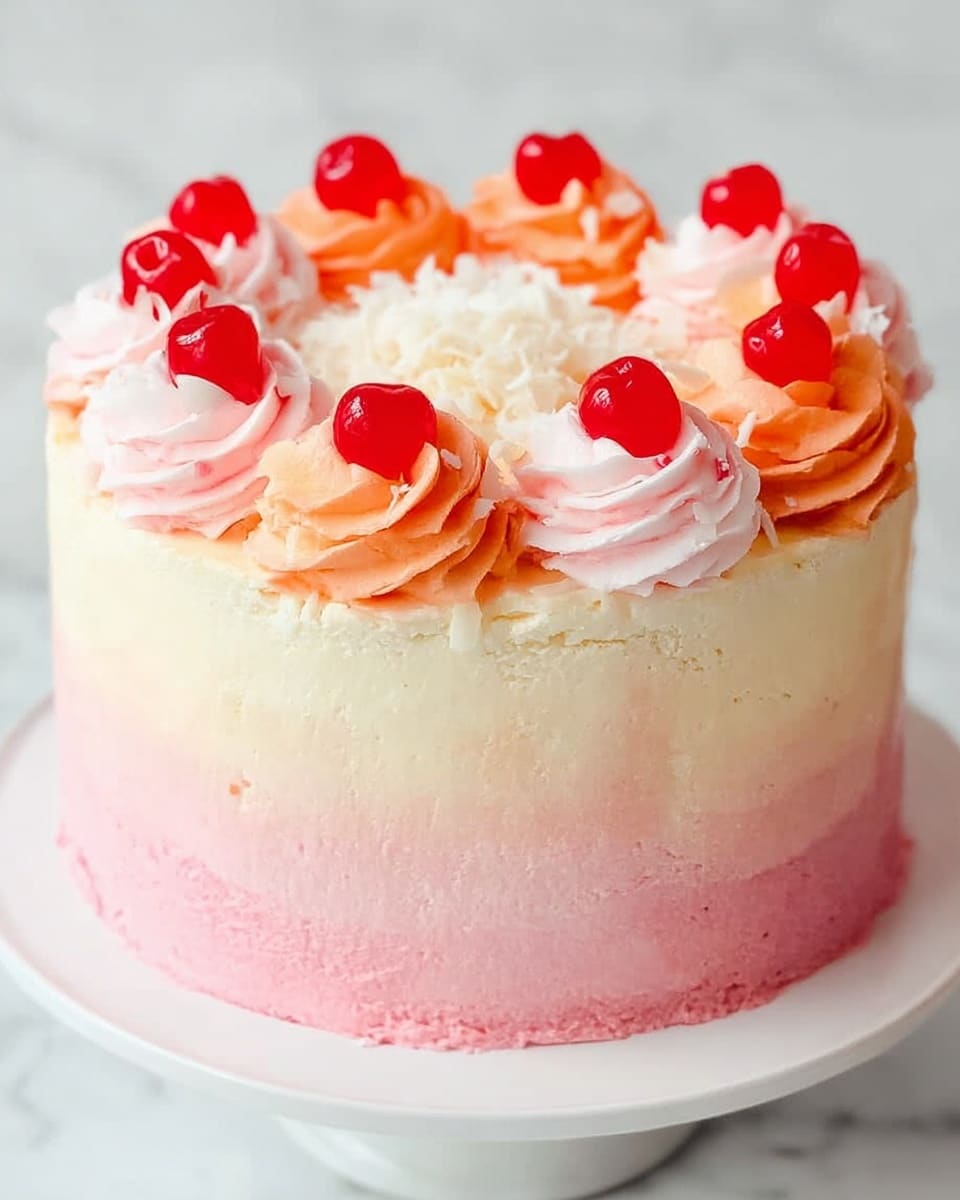
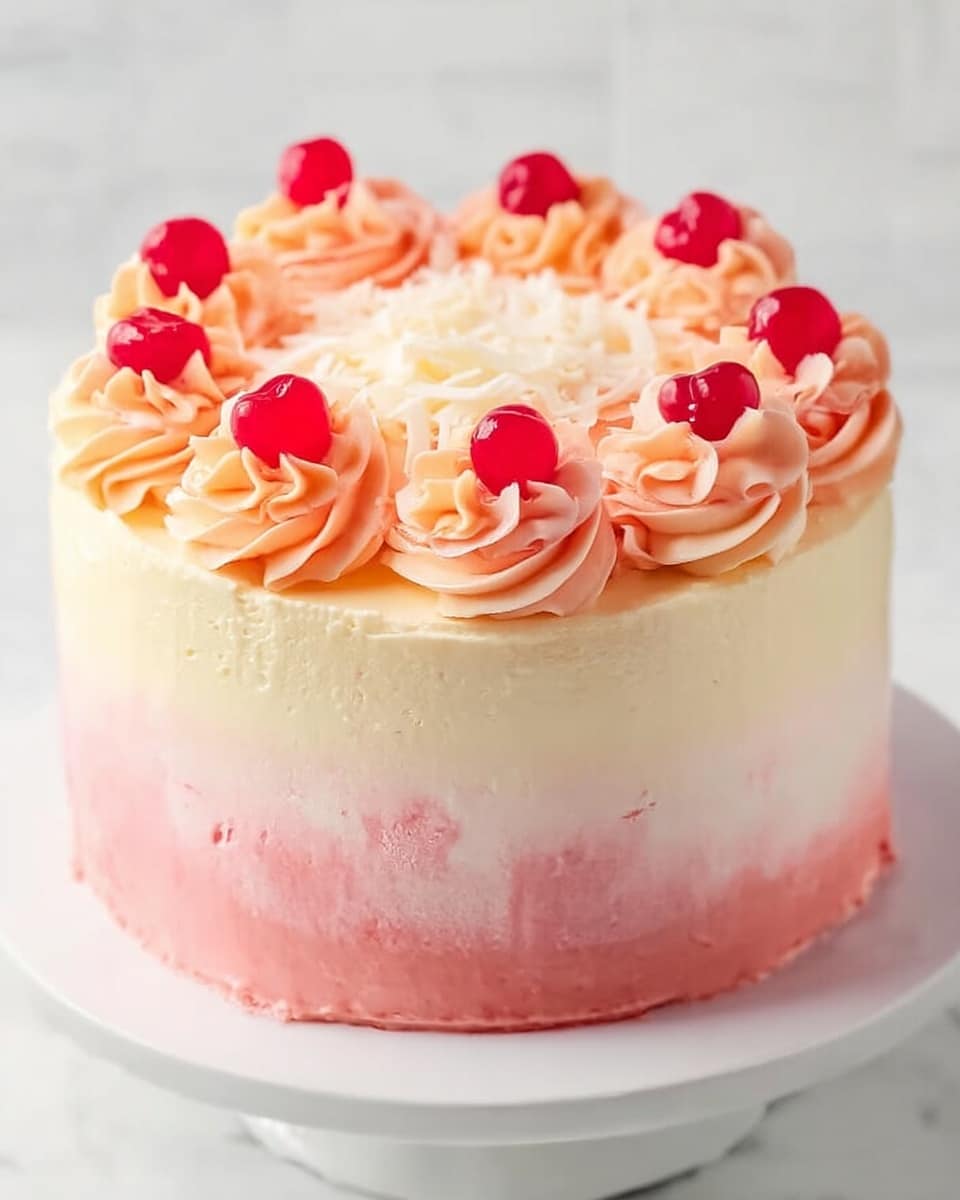
The Malibu Sunset Layer Cake is a vibrant and tropical treat perfect for any celebration. It combines the rich flavors of coconut rum with layers of colorful buttercream, creating a stunning dessert inspired by a beautiful sunset.
Ingredients
- 2 1/4 cups cake flour
- 1/2 cup room temperature milk
- 1/2 cup Malibu coconut rum
- 6 large room temperature egg whites
- 2 tsp coconut extract
- 1/2 tsp vanilla extract
- 1 3/4 cups sugar
- 4 tsp baking powder
- 1 tsp salt
- 1 1/2 sticks butter, softened
- 1/2 cup butter (for frostings)
- 1/2 cup shortening (for frostings)
- 1 tsp vanilla extract (for vanilla buttercream)
- 3–4 cups powdered sugar (for each buttercream)
- 3–4 Tbs milk (for vanilla buttercream)
- 1/4 cup grenadine (for cherry buttercream)
- Red food coloring (for cherry buttercream)
- 1/4 cup pineapple juice (for pineapple buttercream)
- Orange food coloring (for pineapple buttercream)
- Cherries and coconut flakes for garnish (optional)
Instructions
- Step 1: Preheat the oven to 350°F (175°C). Spray and line two 8-inch round cake pans with cooking spray and parchment paper.
- Step 2: In a bowl, mix together the milk, Malibu coconut rum, egg whites, coconut extract, and vanilla extract until well blended. Set aside.
- Step 3: In a large bowl, combine the cake flour, sugar, baking powder, and salt. Use a hand mixer to blend.
- Step 4: Add the softened butter to the dry ingredients and beat until combined.
- Step 5: Gradually add the milk mixture to the batter and beat until smooth and thoroughly mixed.
- Step 6: Divide the batter evenly between the prepared pans.
- Step 7: Bake for about 30 minutes or until the center is set and springs back when lightly touched.
- Step 8: Remove the cakes from the oven and let them cool completely.
- Step 9: Prepare the vanilla buttercream: in a bowl, beat 1/2 cup butter and 1/2 cup shortening until light and fluffy. Add 1 tsp vanilla extract and continue mixing.
- Step 10: Add powdered sugar one cup at a time, then add 3–4 tablespoons milk until reaching the desired consistency. Set aside.
- Step 11: Prepare the cherry buttercream: beat 1/2 cup butter and 1/2 cup shortening until fluffy, then add 1/4 cup grenadine and mix well.
- Step 12: Gradually add powdered sugar, then more grenadine to reach spreading consistency. Add red food coloring until the color is vibrant. Set aside.
- Step 13: Prepare the pineapple buttercream: beat 1/2 cup butter and 1/2 cup shortening until fluffy, add 1/4 cup pineapple juice and mix well.
- Step 14: Add powdered sugar gradually, then add milk as needed until smooth. Add orange food coloring until desired shade is reached. Set aside.
- Step 15: To assemble, place one cake layer on a turntable or cake stand.
- Step 16: Spread half of the vanilla buttercream over the top, stopping about 1/2 inch from the edge.
- Step 17: Using a flat large ribbon piping tip, pipe 1 cup or more of cherry buttercream around the bottom edge of the cake. Reserve remaining cherry buttercream.
- Step 18: Similarly, pipe 1 cup or more of pineapple buttercream around the top edge of the cake. Reserve remaining pineapple buttercream.
- Step 19: Press a bench scraper or cake scraper gently against the cake sides and spin the cake to blend the two frostings smoothly.
- Step 20: Spread the remaining vanilla buttercream over the top and blend it with the pineapple buttercream edges.
- Step 21: Fill another piping bag fitted with a large open star tip with half the cherry buttercream on one side and half the pineapple buttercream on the other, using red and orange colors.
- Step 22: Pipe swirls around the top of the cake until the two colors blend beautifully. Save any leftover frosting for another use.
- Step 23: Optionally, garnish the cake with cherries and coconut flakes.
Tips & Variations
- Use room temperature ingredients for a smoother batter and lighter cake texture.
- For a stronger coconut flavor, toast some shredded coconut and sprinkle it on the frosting.
- Adjust the grenadine and pineapple juice amounts to balance the sweetness and tartness of the buttercreams.
- If you don’t have Malibu rum, substitute with coconut extract and a splash of white rum or water for flavor.
Storage
Store the assembled cake covered in the refrigerator for up to 3 days. Let the cake come to room temperature before serving to enjoy the best texture and flavor. Leftover buttercream can be refrigerated as well, just re-whip briefly before using.
How to Serve
Serve this delicious recipe with your favorite sides.
FAQs
Can I make this cake ahead of time?
Yes, you can bake the cake layers and prepare the buttercream a day ahead. Store the cake layers tightly wrapped at room temperature or refrigerated, and assemble the cake the next day for fresh frosting.
What if I don’t have a turntable or piping tips?
You can still assemble and frost the cake using a spatula and spoon. Smooth the buttercreams as best as you can, and use a small spoon or food-safe plastic bag corner to pipe the swirl decorations.
PrintMalibu Sunset Layer Cake Recipe
The Malibu Sunset Layer Cake is a beautifully vibrant and flavorful layered cake infused with Malibu coconut rum and layered with three distinct buttercream frostings – vanilla, cherry, and pineapple. This tropical-inspired cake combines moist cake layers with smooth, colorful frostings that blend to create a stunning sunset effect, perfect for special occasions or a festive summer dessert.
- Prep Time: 25 minutes
- Cook Time: 30 minutes
- Total Time: 55 minutes
- Yield: 12 servings 1x
- Category: Dessert, Cake
- Method: Baking
- Cuisine: American, Tropical-inspired
Ingredients
Cake
- 2 1/4 cups cake flour
- 1/2 cup room temperature milk
- 1/2 cup Malibu coconut rum
- 6 large room temperature egg whites
- 2 tsp coconut extract
- 1/2 tsp vanilla extract
- 1 3/4 cups sugar
- 4 tsp baking powder
- 1 tsp salt
- 1 1/2 sticks (12 tbsp) butter, softened
Vanilla Buttercream
- 1/2 cup butter
- 1/2 cup shortening
- 1 tsp vanilla extract
- 3–4 cups powdered sugar
- 3–4 tbsp milk
Cherry Buttercream
- 1/2 cup butter
- 1/2 cup shortening
- 1/4 cup grenadine
- Red food coloring (as needed)
- 3–4 cups powdered sugar
Pineapple Buttercream
- 1/2 cup butter
- 1/2 cup shortening
- 1/4 cup pineapple juice
- Orange food coloring (as needed)
- 3–4 cups powdered sugar
Garnish (optional)
- Cherries
- Coconut flakes
Instructions
- Preheat and prepare pans: Preheat your oven to 350°F (175°C). Spray two 8-inch round cake pans with cooking spray and line the bottoms with parchment paper to prevent sticking.
- Mix wet ingredients for cake batter: In a bowl, combine the room temperature milk, Malibu coconut rum, egg whites, coconut extract, and vanilla extract. Mix until well blended and set aside.
- Combine dry ingredients: In a large bowl, sift together the cake flour, sugar, baking powder, and salt. Use a hand mixer to mix these dry ingredients thoroughly.
- Add butter to dry mixture: Add the softened butter (1 1/2 sticks) to the dry ingredients and beat with the hand mixer until fully combined and the mixture looks smooth.
- Incorporate wet mixture: Pour in the previously mixed wet liquid ingredients and continue beating until the batter is smooth and well blended.
- Fill cake pans: Evenly divide the cake batter between the two prepared 8-inch cake pans, smoothing the tops to ensure even baking.
- Bake cakes: Bake in the preheated oven for about 30 minutes, or until the centers of the cakes are set and spring back when lightly pressed.
- Cool cakes: Remove the pans from the oven and allow the cakes to cool completely before removing from pans and frosting.
- Prepare vanilla buttercream: In a mixing bowl, beat 1/2 cup butter and 1/2 cup shortening together with a hand mixer until light and fluffy. Add 1 tsp vanilla extract and continue mixing. Gradually add 3-4 cups powdered sugar, 1 cup at a time, then add 3-4 tablespoons milk to reach desired spreading consistency. Set aside.
- Prepare cherry buttercream: Beat 1/2 cup butter and 1/2 cup shortening until light and fluffy. Add 1/4 cup grenadine and mix well. Slowly add 3-4 cups powdered sugar, 1 cup at a time, adding additional grenadine to reach the right consistency. Stir in red food coloring until the frosting reaches your preferred cherry-red color. Set aside.
- Prepare pineapple buttercream: Beat 1/2 cup butter and 1/2 cup shortening until light and fluffy. Add 1/4 cup pineapple juice and mix thoroughly. Gradually add 3-4 cups powdered sugar, 1 cup at a time, adding a splash of milk as needed for consistency. Add orange food coloring until desired color is achieved. Set aside.
- Assemble cake base layer: Place one of the cooled 8-inch cake layers on a cake turntable or stand. Spread half of the vanilla buttercream evenly over the top of this layer, leaving about a 1/2 inch gap from the edge.
- Pipe cherry buttercream border: Using a large flat ribbon piping tip, pipe about 1 cup or more of cherry buttercream around the bottom edge of the cake. Reserve the remaining cherry buttercream for later use.
- Pipe pineapple buttercream border: Similarly, pipe about 1 cup or more of pineapple buttercream around the top edge of the cake, reserving the rest for piping decorations.
- Smooth frosting edges: Use a cake or bench scraper pressed gently against the cake edges while spinning the cake to blend the cherry and pineapple buttercream borders smoothly together for a gradient effect.
- Add and blend remaining vanilla buttercream: Spread the remaining vanilla buttercream over the top of the cake and blend it carefully with the edge of the pineapple buttercream to create a smooth transition.
- Pipe colorful swirls: Fit two piping bags with large open star tips. Place the remaining cherry buttercream (red) in one side, and the pineapple buttercream (orange) in the other side. Pipe swirls around the top of the cake to enhance the sunset look. You may have leftover frosting.
- Garnish cake: Decorate the cake with fresh cherries and coconut flakes as desired to complement the tropical theme and add texture.
Notes
- Be sure all ingredients, especially butter and egg whites, are at room temperature for best results.
- Use a hand mixer or stand mixer for easier blending and smooth batter and frosting.
- The cake layers must be completely cooled before frosting to avoid melting the buttercream.
- Adjust food coloring to achieve your preferred intensity of red and orange for the cherry and pineapple buttercreams.
- For a non-alcoholic version, substitute Malibu coconut rum with coconut-flavored milk or coconut extract plus milk.
- Leftover frosting can be stored in airtight containers in the fridge for up to 3 days; bring to room temperature before using.
Keywords: Malibu Cake, Layer Cake, Coconut Rum Cake, Tropical Cake, Buttercream Frosting, Sunset Cake, Festive Cake